Sunday, 6 January 2013

Fabric Desire Scarf


I'm always on the lookout for something to make for my mum for Christmas. I came across a fabric scarf in the local market. I just had to have a go.  


It was basically a strip of ribbon with holes punched in it. Casting on the 5 stitches I needed was as simple as putting the knitting needle through 5 consecutive holes.


I then just knitted through the pre-cut holes.


I was really pleased with the results and mum loved it.


Friday, 28 December 2012

Glitter Tree


At Christmas I'm always on the lookout for a little something to take to the cemetery in memory of my Dad. This year I left it too late and the things that I had my eye on had sold out. So, I decided to make something.


I bought a small tree for £2.50  from the garden centre.


Painted on some PVA glue & sprinkled on some glitter.

.

 I added the final touches, a bow at the top and some ribbon around the plant pot.


For Dad, who always made Christmas so special. 

Wednesday, 31 October 2012

2012 Halloween Pumpkins


 I bought 5 Dill's Atlantic Giant Pumpkin seedlings in a charity sale at work. 


I looked after them indoors for a while and then moved them to the green house to harden off.


Once there was no danger of frost I planted them out and then pretty much left them to it.


By the end of the summer I had quite a crop.


One for the doorstep.


Jack  - Nightmare Before Christmas.


And the table center piece.

HAPPY HALLOWEEN!

Betty helps out


Tuesday, 2 October 2012

Hat and scarf storage bags


Autumn is in the air.

 It's time to unpack the hats, gloves & scarves. As I'm a keen knitter we have rather a lot of them. They usually hang about in the hall and often on the dinning room table.


I picked up some colourful fabric in a sale at the Fabric Warehouse.


Within an hour and a half I'd make 2 simple storage bags. 


Much tidier and hopefully no more lost gloves.

Saturday, 8 September 2012

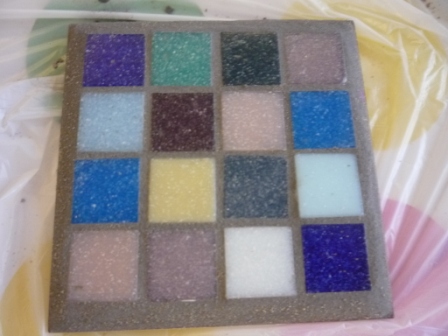
Roman Mosaic Coaster

.

Whilst on holiday on the Isle of Wight we visited the Roman Villa in Brading.
 It was absolutely  fascinating. 


This was one of the largest complete mosaics showing the four seasons. It's one of the best preserved Roman mosaic floors in Northern Europe.


The hypocaust.


Not only did it have a very nice cafe with a good cup of tea, there was also a art & craft tent on site - Jeannie heaven. 
Being a Roman Villa, the craft on offer was mosaic related, making a coaster.


 I decided on the design before gluing the tessere to a tile.


Using sticks as spacers the tesserae were glued to the back of the tile.


We left the glue to set whilst we had another look around the villa site.


 Each tile was supplied with a bag of grout to finish off the coaster at home.


I mixed up the grout in an old container.


 It was spread over the tiles & rubbed in a circular motion to encourage the grout into the gaps.


Next it was left  to dry for 10 minutes and the excess grout wiped off with a damp cloth.


Left for another 10 minutes and then wiped with a dry cloth and left to dry for 24 hours.


24 hours and a polish later, my new coaster was ready to use.
A great reminder of my holiday.

Saturday, 4 August 2012

London 2012 Cushions


The Fabric Warehouse has stocked some fabulous prints for the Diamond Jubilee and London 2012. I bought a selection not really knowing what to do with them. The obvious choice was cushion covers for a quick and easy make. 
  I was looking for a simple design as I wanted the fabric to be the feature of the cushion covers. A search of the Internet came up with various patterns. I decided to go for a basic envelope design that I could make quickly when I found myself with a free hour one evening. This design  required 1 large piece of fabric for the front of the cover and 2 smaller overlapping pieces of fabric for the back. 

A quick cheat that I was taught at school was to place a pin in fabric at 90 degrees to the direction of sewing. It saves time tacking the fabric as you can sew straight over the pins. 


I snipped  the corners off before turning the cover the right way out. This makes for a neater corner. 

First cushion cover finished. Not bad for an hour's work.


I got a bit braver with the other covers and made them slightly more elaborate by  sewing a hem an inch in from the edge to make a boarder.


There was a slight problem. I didn't make the envelope overlap big enough. Together with the fact that I had made the covers 2 inches smaller than the cushion measurement, the cushions were bulging out.

You couldn't tell this from the from the front, but it bothered me, so I added some buttons and loops of elastic to to fasten then.


All ready for sit down with a nice cup of tea.

Bea-Bea helps out